
Something non-Christmassy for you today. This lovely little box is one I crafted with a lovely crafting friend last week and is so simple to put together. I could not resist decorating it with some flowers from the Flower Patch stamp set after having a play with this set and the matching dies. They are gorgeous! What a lovely bunch they make on the front of this Top Note box.
The box top and base are simply made from the Top Note Die for the Big Shot. I have used the slightly sturdier Under The Tree DSP from the Aut/Wint catalogue as I loved the Kraft colour of this and the pattern for the background for this project. The small box inside which opens out is made from the new Kraft cardstock from the main catalogue.


Make Instructions:
- Cut a piece of card for your internal box, 5 1/2" x 8" (14cm x 20.3cm)
- On the 8" Long edge, score at 1", 3 1/2", 4 1/2" and 7"
- On the Shorter 5 1/2" edge, score at 1" and 4 1/2"

- Fold on all score lines and then cut the fold lines up until the 1" score lines on all sides
- I then slim down the tab pieces which are going to fold in to be stuck so that they are neatly finished and not visible on the completed box edges

- Now you are ready to stick your box together. I would always recommend the Sticky Strip when sticking a 3D object as this has a lot of strength and is permanent so will allow you to put heavier items (more chocolate!) in your projects.
- When putting the box together, remember one side will be your opening lid. I made sure I stuck the base of the box together first then I folded the lid over the base and stuck it together whilst in position to make sure the lid fitted over the base when complete.

- To cut the Top Note outer pieces for the box, cut 2 pieces of cardstock (I used the Under the Tree DSP) to 3 1/4" x 5"
- Use the Top Note die to cut both pieces (remember as it is an Original die it can cut multiple layers at once). Line up one of the 5" edges to just cover the right hand finish point of the Top Note (see photo). Note, the left hand edge will be left straight and uncut by the die.

- You can stick the two outer layers directly onto the box top and base, but for mine I created a spine for the box to wrap round the mid section to join the two outer Top Note pieces. To create this I cut a piece of matching cardstock 4 4/16" x 2 9/16" (sorry my original was a metric 11.2cm x 6.6cm). I scored the long edge at 1/4" on each side (or 2cm each side)
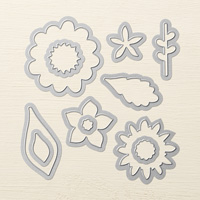
To make the Flower Patch Flowers I used the Flower Patch Stamps with matching Flower Flair framelits from page 154-156 of the main catalogue. This is a bundle set which was a birthday treat for me.
I have copied the colour combinations from the catalogue using Costal Cabana, So Saffron, Crisp Cantaloupe, Pear Pizazz, Old Olive and Hello Honey ink colours for the base flowers which I stamped and then cut with the matching Flower Flair dies. I then used some Crushed Curry Emboss Powder on Bermuda Bay and Calypso Coral card to create the flower centres. The flowers are then layered onto the box front with dimensionals.
Don't forget to wrap your ribbon tie round the box first before sticking your flowers on! I used the Organza Ribbon which is still a firm favourite and looks so elegant with the flowers.
The weather outside is certainly watering the garden, but there are not too many signs of flowers in our garden at the moment. I think a trip to the garden centre to invest in some spring bulbs is needed and I might just stop for a warming cup of tea whilst I am there.
Suzanne
x
Suzanne
x
Products I used:
In a new and improved version of my blog I am now adding a little picture of the products so you can see them when they are listed out. Please note though that where I have used a bundle offer I am listing the individual product codes and not the code for the bundle. This is to give you the best view of the products and flexibility to buy separately. If you do want the bundle saving remember to swap the codes for a bundle saving. These images will take you directly to my online store for the product.
In a new and improved version of my blog I am now adding a little picture of the products so you can see them when they are listed out. Please note though that where I have used a bundle offer I am listing the individual product codes and not the code for the bundle. This is to give you the best view of the products and flexibility to buy separately. If you do want the bundle saving remember to swap the codes for a bundle saving. These images will take you directly to my online store for the product.
 |  |  |  |  |
 |  |  |  |  |
 |  |  |  |  |
 |  |  |
No comments:
Post a Comment