Pages

Sunday 21 December 2014

Christmas Countdown #5 - Wondrous Wreath Unwrapped


Well I am a bit behind on the Christmas Countdown, but here's a peek at a series of the more special Christmas cards I made for this years flurry through the postal system. They are a little thicker to post due to the ribbon ties so are perfect for those people you are seeing in person, but I wanted to send them through the post too for that extra special 'wow!' for those I knew would appreciate them the most.

I am forever asking forgiveness for my poor photography and today is no exception.We have a new camera and in a moment of panic I had to photo the cards with no instruction on how to use it and no time to read the manual! My new year's resolution will definitely be to read the manual!


The card is based around a design by the lovely Michelle Last who has a style I just love. The stamp set is the Wondrous Wreath set which comes as a bundle saving in the seasonal catalogue. Originally I missed out on ordering this set despite loving it when I first set sight on the seasonal catalogue, but soon all the lovely examples of cards just tempted me back to ordering it. I cannot wait to try out the other birthday card and all year celebration cards I have seen using it too. 

I have used, as Michelle did too, the Noel thinlit from the dies and layered it up to give it some additional stiffness and for it to stand out in the Silver Foil Card which is the top layer. My Noel is mounted on the stamped wreath image from the set.  I have stamped the two-step image with Soft Sky and Lost Lagoon to give the two tones for the leaves.

I have hung my wreath upon the All Is Calm DSP which also adorns the side panels of the card. I love the luxurious bows of ribbons used to wrap round the card under the wreath and tie in a bow at the sides. The All Is Calm is still a firm favourite and with the matching Lost Lagoon Silk Taffeta Ribbon it looks even more stunning. I love a card design that you can add sparkles too as you know, so who needs berries when you can add Rhinestones?

At Christmas it is the contact with those we love most which makes it the special occasion it really is and my father said to me in a poignant moment this season that it is not the card that counts the most, but the words inside it. I think the sentiment in this set is so true of those words as it says "May happy moments & cherished memories surround you with joy this season". I am hoping this season brings us some happy moments to cherish and the year ahead some joy too.

Hopefully I will make it back before the turkey is in the oven for some more inspiration for those last minute projects or ideas, but for now I will leave you with those sentiments.

Suzanne
x

Products I used for my cards:


To place an order, book a workshop in your home or come to a class, just drop me an email at craftyinkbuds@sky.com. Remember you can now order online at anytime too.

Wednesday 10 December 2014

Christmas Countdown #4 - Neat Treats with Gift Card Enclosures

Today's post is a quick reminder on just how easy it is to put together a little treat at Christmas and give it the Stampin' Up! treatment to make it a lovely personalised gift. This little package contains some yummy cookies I found at my local garden centre in their food section and an individually wrapped tea bag with a lovely saying on the packet. Perfect for a visit to a friend to make sure there is time to put the kettle on and have a chat.

I love other uses for the products we have and this is made from the Gift Card Enclosures which have made their first appearance in our catalogues. The gift card enclosures have slits pre-cut inside to add a gift card to decorate and give a unique personalised finish to a gift voucher or card, however simply wrapped round the treats and secures with a designer paper band here it has transformed into smart packaging for the goodies inside.

I decorated my package with the Under the Tree Speciality Paper.  I simply folded up three of the semi-circle flaps around the bottom half of the card holder whilst my contents were in place and then folded a band of the DSP round, securing it in place.  I then added the Real Red cotton ribbon and some Festival of Trees stamped and punched images. The pearls were a little extra snow effect for the tree.

Remember that the ordering for Stampin' Up! is pretty busy during the festive season so if you plan an order or have a wish list for Christmas then make sure you order soon to avoid the disappointment of it not arriving before Christmas. 

Stampin' Up! are advising that last orders should be placed by 15th December - yes we really are that close to Christmas - Eeek!

Don't forget to add some bargains to your wish list from the Clearance Rack and Year-End Closeouts.


I hope you are all further ahead with your Christmas cards, projects and shopping than I am!

Suzanne

x

Products I used for my Gift Card Enclosure Dress-Up:


To place an order, book a workshop in your home or come to a class, just drop me an email at craftyinkbuds@sky.com. Remember you can now order online at anytime too.

Friday 5 December 2014

End of Year Clear Out! Grab a bargain!


It's Year End Closeouts from Stampin' Up! Wow! Some items are up to 80% discount and in perfect time for Christmas Orders.  There are some great favourites on the list including favourite seasonal stamps from past, beautiful designer papers and  ribbons and accessories too!  What a great time to give your wish list to others for some gifts you will really appreciate or gift to others to see their delight!

Items are whilst stocks last only and can be ordered online by Clicking my link 'Shop Online with Suzanne' on my blog page here or by contacting me to place an order.

Suzanne
x

Wednesday 3 December 2014

Christmas Countdown #3 - It's Crackers here!


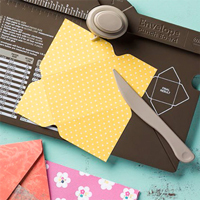
It's been crackers here in the house!  These pictures are of my first crackers so easily made with the Envelope Punch Board. They are a size just perfect for a table favour or for a gift wrapping for a little something.  Mine are Christmas themed and I just love them in the blue and green hues of the All is calm (guess what is going to be on my table this festive dinnertime!).


I used some of the Lost lagoon ribbon to tie the ends on the Blue version and on the green version there is the Organza Whisper White ribbon. You can just see a little All Is Calm Snowflake Embellishment there which looks fantastic tied in with the ribbon for a special touch, I have even seen an example of these being made into earrings they are so pretty.

The crackers are six-sided and I got my make details from a fellow Inspirin' Inkin' team member, Elaine Harding. You can also make four-sided crackers, but I think these are much more special.

The measurement for these little ones are as follows:
  1. Start with your DSP or cardstock measuring 6" x 5 7/8"
  2. On the 5 7/8" side, score at 1/2"  (if using DSP then use the largest end of the score stylus so as not to tear the paper)
  3. Then score every 7/8" (I found the easiest way to do this was move the 1/2" initial score to the next whole number " (i.e. 1") mark and then score at 7/8" from this whole number (i.e. 1 7/8"). I would then move the last score to the next whole number " mark (i.e. 2") and score again 7/8" from this i.e. (2 7/8").
  4. Once you have repeated this you should have an initial 1/2" score and then six more scores 7/8" apart, giving you your six sides for the cracker.
  5. Spin your paper so that the 6" side is now along the top
  6. Score at 1", 1 1/2", 2", and then 4", 4 1/2" and 5"
  7. Take the first fold line on the 5 7/8" side and fold the paper on the fold
  8. With the envelope punch board line the paper up and punch at 1 1/2"
  9. Unfold and then fold on the second fold line
  10. With the envelope punch board, punch at 1 1/2"
  11. Keep unfolding and then folding on each fold line and punching until all fold lines have been punched
  12. Turn the paper round 180 degrees to line up the other end of the cracker 
  13. Repeat steps 7-11 to punch the other end of the cracker
  14. Stick you cracker together along the 1/2" tab using Sticky Strip (so it can hold your contents Ok).
  15. Fold the two ends of the cracker alternating the folds so that the cracker end forms
  16. Tie your ribbon round one end of the cracker
  17. Put in your contents for your cracker
  18. Tie the other end with your ribbon again and add your embellishments
The crackers I have made have some decorated tealight candles in them which I found fitted perfectly in the diameter of this sized cracker. We all have surplus tealight candles I am sure, especially after a trip to that well known Swedish store! One of the other ones I have made has a chocolate Easter Egg in it, so proves that there are other times of years the crackers can be gifted.  I think even a lip balm, some chocolate mint rounds, chocolate balls, or come to think of it, any other small chocolates would be just fine with me! 

I have used the Label Love Stamp set for a label background by masking out the text in one of the stamps and then have used the Holiday Homes set again for my Christmas saying and snowflakes.  I have punched my co-ordinating Pear Pizazz cardstock with the Artisan Label Punch to layer the label up.  The saying is also punched from the white card with the Word Window Punch.

Another variation I made was with the Under the Tree Speciality Paper.  Just a word of warning with this paper though as it is very good quality and thicker than DSP. When you fold the paper over to punch it in the Envelope Punch Board there are two layers to punch through and it is pretty tough to punch.  It may well be this could be too much for the punch board in thickness and could break it, so if you do want to try this paper, be warned.


The second cracker on the bottom in this paper has a label from the Tag a Bag Accessories Kit.  A simple saying stamped on it and it was an instant label.  

I have gifts for my own festive table crackers which are a little bit special so need a larger cracker so I am off to make those now. I have snaps I have purchased and will of course be adding a traditional paper hat and joke too.

There are kits on offer in the usual stores to make your own crackers, but I think these are far prettier. I hope you agree think you would like to have a try yourself.

Suzanne
x


Products I used for the All Is Calm Crackers:


Alternative products I used for the Under the Tree Crackers:


To place an order, book a workshop in your home or come to a class, just drop me an email at craftyinkbuds@sky.com. Remember you can now order online at anytime too.

Friday 28 November 2014

Countdown to Christmas #2 - Bearing Gifts Perpetual Calendar

Before the Countdown to Christmas project there is not just BLACK FRIDAY offers going on, there is a fantastic Stampin' Up! Joining Offer too!!  It is for one week only until 2ND DECEMBER so get your skates on and read on for the details.
If you have ever considered, pondered or wondered about what benefits joining Stampin' Up! as a demonstrator could bring then let me tell you more about the BEST offer we have ever had.

  • There is a whopping 25% off the £99 starter kit so it will be just £74.25!! 
  • For your £74.25 you can choose up to £130 in Stampin’ Up! products for your kit from the main or Autumn-Winter catalogues. That’s over £50 in FREE product!
  • Once you join Stampin’ Up! UK, you receive a one-time 30% off discount with a product order of £150 or more placed within 45 days.
  • Continual 20% discount! Enjoy a minimum of a 20% demonstrator discount on EVERY Stampin’ Up! order you place.
  • There is a 5% Bonus EXCLUSIVE cash back on all personal purchases and customer sales in December 2014 with this special deal. This is in addition to your usual discounts and will be paid in January 2015.
  • If you join then from December 5th 2014 you will be one of the first to see and pre-order products from the NEW Spring-Summer Catalogue and earn Sale-A-Bration products!
  • The Offer kit is only available 25th November until 2nd December 2014.
If you are still not too sure or you are thinking 'what's the catch?' Just call me for a friendly, no pressure, chat over the details. I can tell you how much fun it is to share your creativity and be rewarded or even if you want to keep it all to yourself and just use the discount to enjoy the products.

If you are ready to go then just go straight HERE

Now a little something to inspire the creativity for Christmas.  Here is my little Calendar made with the Bearing Gifts stamp.  


This stamp is gorgeous, who does not love a Polar Bear for Christmas? He is a lovely outline stamp that you can stamp and leave or colour in as I have done with the blender pens. I just used my collection of coloured markers with a little help from the underside of the lid of an ink pad (or a smooth wipeable surface). Just run your marker pen on the inside of the ink pad lid (or wipeable surface) and you will get a little pool of the ink colour. Then you can just use a blender pen to pick up the colour and colour in an image. It produces a more watercolour effect than using the marker pens directly to colour.

This is another little box project and this time the boxes are made from cardstock with the Envelope Punch Board.  I think my boxes measured 4.3cm x 4.3cm when complete.You could also make them with the Gift Box Punch Board which I did for my second version after it arrived, as the smallest dimension box on the measurements given with the tool are for a box 1.75" x 1.75". This tool is fab for making all your gift boxes for presents too, no more searching the shops for the right size!

My boxes and background are decorated with the All Is Calm papers again. The numbers are in Dazzling Diamond Glimmer Paper so really dazzle and stand out giving the boxes a little added dimension. They are cut with the Perfect Print Numbers Die. The bear is also stamped on a Top Note cut with die for the Big Shot.

For the numbers if you make one of these for yourself you will need to number the two boxes. After finishing my boxes late one evening I have to admit this had me stumped, but a quick search online next day provided the answer.  So, here it is for you, box #1 needs to be numbered 0, 1, 2, 3, 4, 5. Box #2 needs to be numbered 0, 1, 2, 7, 8, and 9.  

The sentiment is 'Bearing Gifts of Christmas Cheer' which is under the bear on the single wood-mount stamp.  I have stamped again on a separate strip to add it to the ledge. The ledge of the box is also angled down slightly to make the boxes sit back.  I have also stamped a few snowflakes onto the DSP with my Holiday Home stamp set, but these are just a little extra.  There are so many little extras in this set to use on seasonal projects!

The DECEMBER for the calendar has come from the Project Life Day to Day stamp set. A must for your Project Life, calendar, scrapbooking or memory making projects.  

I can't wait to sit this on the mantle and start the December calendar rolling!

Suzanne
x

The products I used:


To place an order, book a workshop in your home or come to a class, just drop me an email at craftyinkbuds@sky.com. Remember you can now order online at anytime too.