Well there have been no flurries of winter snow just yet, but I thought I would share a cute card with you today made with the snowman dress up set Snow Day. I have to admit as much as I love the idea of making a snowman in the snow with my little one, my poor car does not like the snow and we are usually left housebound until the snow clears so the prospect of a wintery shower comes with mixed feelings for me.
This snowman though requires no cold outings and just some fun with some sparkle and ribbon. He is stamped and embossed with the Iridescent Ice emboss powder (101930) to give him a lovely glistening snow effect. You can almost imagine he is outside taking in the winter sunshine! The layers of snow mounds are cut (free-hand with scissors, you can probably tell) out of the Shimmery White Cardstock (121717) for the added sparkly snow effect.
The Snow Day stamp set (131892) comes with all the little accessories of the hat, scarf and other little additions to make your winter scenes with. I bought the set in wood as I wanted to use it with my little one and the wood blocks are easy to hold and robust for little hands. The set does have a scarf stamp in it, but I wanted to add some embellishment so I tied a length of the stitched grosgrain round my snowman for a 3-D element to the card.
Tip: To line everything up with a wood set each time I have cut some window sheets into squares and then used the Stamp-a-ma-jig and staz on ink to stamp the images in each corner of the window sheet squares to use as templates each time. I just pop them inside the case and they are there ready to use each time.
I made my winter sky on this card with a mixture of Pool Party, Pistachio Pudding and Crumb Cake colours using a sponging effect and then stamped the little snowflakes in the co-ordinated colours. I also added little daubing round the edges of the background and on the edges of the snow mounds.
Like my little snowman in my ice emboss, but want a quick stamped version? Here he is again on my sweetie cones (mine were made with the retired Petal Cone die).
A lovely frosty Pool Party snowman with accessories. I have even given him a little sash with the wavy 'warm wishes' wording from the stamp set. The photo does not show it so well, but the snowflake from the set is stamped in the Craft White Ink for a snowy background. I have filled my cone with big fluffy marshmallows and made a hanging with the Organza Ribbon from the annual catalogue so he can be hung in pride of place on the Christmas Tree.
To place an order, book a workshop in your home or come to a class, just drop me an email at craftyinkbuds@sky.com. Remember you can now order online at anytime too by just clicking on the link from my main blog page.
Sunday, 24 November 2013
Friday, 22 November 2013
Festive Flurry Merry Expressions
It's all a flurry of festiveness at our house! I am busy preparing for a couple of local Christmas Fayre's I am going to be going along to and I am crafting at every possible spare moment. I just thought I would take some time out from creativity to share with you over the next few posts some of the beautiful things I have managed to make.
This card is fully inspired by a fellow demonstrator, Donna at our fantastic Inspirin' Inkin' team training. Donna was fabulous at showing us all how to put together the Festive Flurry decorations as they are seen on in the Autumn/Winter catalogue on pages 12 and 13 (I will post the decorations on another post later on). Donna also made some great cards and projects to inspire us all with and this card design was one.
I have started off with a square Island Indigo textured card base measuring 13.5 x 13.5cm (available in the Autumn/Winter catalogue for a limited time). I have then added a layer of Pool Party which measured 13cm x 27cm. I scored the Pool Party card at 13cm and 19cm. I then ran the edge of the 7cm section through the Big Shot with the Adorning Accents Edgelits and then again with the matching emboss folder to give the decorative edge. This was then layered on top of the base layer and folded back on itself to give the folded effect. A final layer of Whisper White was stamped and layered on top again.
The Festive Flurry snowflake was stamped with the largest image in Pool Party, then the next size of layers was inked in Bermuda Bay (stamped twice). The fabulous sparkle layers were added with the Glimmer paper cut with the Festive Flurry dies (the largest and the smallest sizes). For an addition to top the final glimmer layer I cut the centre of the second of the Bermuda Bay images (by hand) to add a centre detail.
Then finally, the 'Merry' sentiment is made from the Expressions thinlits for the Big Shot. I love this, it really finishes off the snowflake with a festive sentiment. I think I am going to be 'Merry' all year through......and 'Thankful' and giving lots of .....'Love' (these are the other words in the set).
Here is a side view of the card so you can see the folds and also I have stamped a 'Merry Christmas' on the back (Greetings of the Season) as I thought it would look a bit too busy to add another sentiment to the white layer and wanted the contrast of the white with the snowflake to stand out.The Festive Flurry comes as a Wood/Clear stamp set or you can save yourself 15% buying the bundle of the stamps and the matching dies for the Big Shot!
Festive Flurry Bundle 133284 Wood /133285 Clear (pg 30 Aut/Wint)
Greetings of the Season (Aut/Wint Carry Over)
Expressions Thinlits Dies 132171
Adorning Accents Edgelits 125595
Adorning Accents Folders 125601
Glimmer Paper 124005
Island Indigo 12x12" Textured Card 132132
I have made so many Festive Flurry projects so far so be warned there are lots more to come!
To place an order, book a workshop in your home or come to a class, just drop me an email at craftyinkbuds@sky.com. Remember you can now order online anytime too by selecting to 'Shop Now'.
Thursday, 31 October 2013
Halloween with My Digital Studio
Today another great promotion to tell you about. I mentioned My Digital Studio in my last blog post, well Stampin' Up! are making it even easier for you to get organised and gifting during the festive season with better value by offering a 30% discount on (selected) seasonal downloads from now until 29 November 2013.
I have been hovering my mouse over those on offer and there are photobook templates, frameables, stamps and much more to choose from to help with Christmas planning, greeting cards, seasonal home decoration and creating ever lasting memories of the season. There is plenty to share with family and friends as the photobooks and calendars make perfect gifts. Not just photobooks and calendars, there are many printing services out there offering a wide range of printed products that you can use your digital designs created with MDS on .
All the My Digital Studio software and downloads are available 24-7 on my online store. Just click on the shortcuts to 'Shop With Me Now' on my Crafty Ink Buds Blog or the 'Shop' link if you are reading this on my Stampin' Up! home page.
Now for a little My Digital Studio project of my own. It's time for Halloween celebrations today and just a few more treats to add to the cauldron for our spooky visitors and Halloween party this afternoon. The Sweetie Halloween treats here are made with retired Candy Wrapper die for the Big Shot and decorated with the same label and sentiment as I made for my witches broomsticks on my earlier post.
The twisted favours are a fantastically easy way of wrapping treats, not just for Halloween, but easily used for Seasonal table placements at Christmas, Wedding favours or just dinner parties. Fill them with chocolates, sweets, fortune cookie style sentiments.......just add your own unique touches.
My favours here are made using the Howlstooth & Scaringbone Designer Series Paper (129827 on MDS). The labels are really cute aren't they? They are from MDS also, the Tricky Treats Stamp Brush Set - Digital Download (131232). I wanted some quick tags to add to my favours so I downloaded the designs, edited them to the size and colours I wanted and then snipped them out. As you would expect, all the MDS content is compatible with the other Stampin' Up! products and you can probably instantly recognise the punch shapes for the Curly Label Punch and X-Large Tag Punch in this set. What could be better, if you have these punches, no snipping required, just punch away!
For my sized favours which are holding 6 mini chocolate foil balls. You will need:
1 piece of 14cm x 10.5cm Designer Paper or cardstock
Sticky Strip or Double Sided tape
Crimper or Stampin' Up! Striped Emboss Folder (optional)
Stamps or other embellishments as you desire
How to make a twisted favour:
- Take the DSP or cardstock on the longest edge (14cm)
- Crimp or emboss your design along the edges if you wish to have a finished edge (optional). I used the Striped Emboss folder on approx 1-1.5cm (just past the Stampin' Up! logo). As you are using the shorter edge of the emboss folder you will need to emboss again the last 3.5cm.
- Stamp your images if you are using a stamp set to decorate cardstock. If not, skip to the next step.
- Attach sticky strip to one of the shorter (10.5cm) edges and stick to the opposite shorter edge. Make sure you do this with out pressing or folding the paper or card too much so that you have a cylinder shape with your decorative edges either end.
- Carefully take one end of the cyclinder and press the edges together. It's good at this point to create this with the join of the paper in the middle of the end if you can.
- Sticky strip to seal the end together.
- Fill with your contents (try not to eat too many first!)
- Now for the twisted part.....just turn and stick the other end perpendicular (a quarter turn) to the end you have already sealed.
- Add a decorated strip wrapped round the favour to dress it or just a tag and some ribbon as I have done.
The great thing about the digital download content is once downloaded you can use these for multiple projects. Today it is the treats, but I will be sure to be using the content to record our Halloween Party moments on a scrapbook page or photobook too.
Some more Halloween crafting took place yesterday too. Here is my little helper assisting in the kitchen to make some Pumpkin Cookies using the Sweet Pressed Cookie Stamps. Great for little hands to hold onto. They may not have been perfectly formed and I am not sure my baking skills were up to top marks, but we had some fun! The Holidays set we have has the lovely festive snowflake as well as the Halloween pumpkin, but the handle you buy can be inter-changed with the Special Events set too (available separately). It makes a lovely gift for Christmas for the British Bake Off fans amongst your friends and family or just for baking fun with your own little helpers if you have them.
Now for some dressing up fun later.
Suzanne
x
If you would like to know more or see MDS in action, just drop me an email or give me a call and we can talk some more.
Saturday, 26 October 2013
Spooky Wishes with Halloween Banner Kit
The kit is all you need to start making your own banners; There are 18 canvas pennants in 3 different designs, jute twine and most importantly there are the image stencils for 3 designs of backgrounds and the alphabet lettering. It is all you need to make your own Birthday, Christmas, occasion banners. The canvas pennants with the eyelets already set in them make putting your own messages so quick and easy and durable for multiple use year after year. You can also buy more pennants when you need them making the number of banners you can make endless.
For my Spooky banner, I have added the Halloween Banner Simply Created Accessory Kit (available separately) to instantly transform my Spooky banner with glitz, glamour and a little spookiness too of course! Now, I wanted to show some close ups to see the detail, but as my photography skills are pretty lacking, they still do not show the banner in it's full glory.
The Skull, bat and spider pieces are made of durable plastic (of some sorts) and sparkly black glitter. There are buttons and ribbons all included in the accessory kit and all the designer papers already scored ready to fold and stick into rosettes.
Not in time to order and make your own Spooky banner? Don't despair, there is also a fantastic winter wonder Christmas Banner Accessory Kit available too for your extra sparkle christmas messages. Remember though you can create your own totally unique worded banners from your own products and papers using the stencils in the kit and the spritzer sprays included, just add your colour using ink (ink refills available separartely). Alternatively you can sponge the colours of your choice with the stencils as I have done.
Elizabeth's site is a wonder of ideas, videos and templates, but I am afraid I winged it and made up my own measurements and method as I went along - I think I could have saved myself some pain by purchasing some instructions!
The picture is of the finished chest along with some witches broomsticks made with blackcurrant liquorice pieces. The wood-effect on the chest is stamped with the Woodgrain background stamp and the Happy Halloween is from the Delightful Dozen stamp set - my favourite all-year round set which has seen many outings. My batty and ghostly ghoul friends on the broomsticks are from the ever-adaptable Owl Builder punch.
To place an order, book a workshop in your home or come to a class, just drop me an email at craftyinkbuds@sky.com. Remember you can now order online at anytime too.
Tuesday, 22 October 2013
Birthday Celebration from Stampin' Up!
Another offer from Stampin' Up! Today to continue their celebration of 25 years, this time it's 25% off a selection of stamp sets including Christmas sets and single stamps. There are also some favorites such as Gorgeous Grunge, Christmas Star, Zoo Babies in there and some great sentiments sets.
Don't just take my word for it, go take a look for yourself. You viewing the huge list in my online store by just Click Here and select 'SHOP'. Then look for '25% off 25 stamp sets' heading on the left.
Alternatively, to Download a PDF list of the stamp click on Download PDF Here.
I hope you like them too! If you do and want to order.....to place an order online from my online shop, just click to setup an account and then add the items to your bag and checkout as you would normally when online shopping. Or if you would prefer, just drop me an email at craftyinkbuds@sky.com to order or give me a call.
Monday, 21 October 2013
Epic Day This and That Birthday Wishes
Today is my hubby's birthday and I have not been able to wait to show you the birthday card I crafted for him to celebrate and mark the occasion. Now my hubby is a techie-geek so his birthday wish list was for the latest gadget of course. These things are not the cheapest presents to buy so that really didn't leave much else for me to go purchase. I love usually just going and buying little inexpensive bits which I can put some thought into for presents (probably as this is what I like most to receive too) so I wanted to put something into his card instead.
When searching around for male card ideas I came across a gifting card idea on Splitcoaststampers, but I cannot trace back to find the name, sorry. The card was a concertina of ideas and pockets in which to put little extra gifts such as gift cards, vouchers etc... As soon as I saw it I started to think of which DSP and ideas I could use. First of all though, here is the finished card so you can see it in all it's glory too!
Wow! I am beaming with pride! There is a huge list of what I used on this card; in fact it would probably be easier just to list what I haven't used on it!! To make your own though the greatest thing is that you can just use whatever you have and come up with your own design. I have also used some retired items on my card as I had them to hand and I wanted to put them to use.
I used the layout design from the card I saw and then decided I would use the Epic Day This and That designer papers as these were perfect for a masculine card. The colour theme throughout was Crumb Cake, Soft Suede and Pool party with some Calypso Coral and Early Expresso too. Keep reading though for the complete list of items used later.
There are three pockets on the card made to individual sizes. The pockets have slide out tabs made with the Decorative Label punch cut in half and secured on either end of a folded piece of card then tied with linen thread.


The 'I' of the card was themed "I feel lucky". I put a lottery ticket in this one for my Hubby, but it just as easily could contain a gift card.
I made my photo frame a little 'homemade' in styling, but you could use a square punch to get a more finished look. Did you see the gorgeous little button brads from the Vintage Trinkets on each of the frame corners?
The 'T' was for tickets for the cinema. As you don't generally get a ticket stub for the cinema in these times, I put a little promise note in there.
There was wording promising a cinema visit with hubby's choice of film. I had to promise no romantic chick-flick and so I am sure to be seeing a sci-fi or adrenalin-fuelled man-film in the near future!
'H' was for 'Husband'. A tab of lovely words for thanks for being my hubby. We don't often say these things as every day life catches up on us so it is great to be able to offer them on occasions with meaning.
'D' was for the day and dates which had special meaning for us. The This and That range of products are all there to help capture your happiest and most memorable moments.
I used the Rotary Stamp to put reminders of special dates for us on this section of the card. "Don't forget", "Best Wishes", "Best Day Ever" and "Pencil Me In" for - our wedding anniversary, the big day, the day our son was born and a meal date.
(Note: I amended the year for the best day ever stamp from to say 2010 using the 2016 as the stamp dates on the rotary stamp are all for the current and future years).
The 'Y' is for 'Yummy', what would a birthday be without a cake?
Now, for the long list of the items used on the card..........
Stamps:
130435 Alphabetized - for the 'happy'; I used the stamp-a-ma-jig and individual inked letters.
130535 Four You - "Birthday" on letter 'B'
130889 Simply Stars
128697 Pennant Parade - "Wish Big" on 'R', pennants on 'T', "Love" on 'H'
126941 Take a Ticket - on 'T'
130631 Chalk Talk - on 'H' tab and 'D'
128520 Create a Cupcake - "Happy Birthday" on 'D'
130336 Express Yourself - "amazing", "Happy Birthday" and "Celebrate" on 'A'
130390 Birthday Cake - on 'Y'
128547 Delightful Dozen - "Blow out your candles" on 'Y'
Accessories:
130814 Epic This and That Designer Papers
104199 Linen Thread
130029 Regal Buttons - on 'I'
118764 Vintage Trinkets - on 'I', 'T' and 'H'
131272 Simply Pressed Clay Moulds Buttons and Blossoms - button in Pool Party on 'R'
Punches/Dies:
119850 1-3/4" (4.4cm) Circle
125598 Labels Collection Framelits Dies
120907 Decorative Label - all tabs and "Love" label on 'H'
119871 Corner
122361 Petite Pennant Builder
129404 Scallop 7/8" (2.2cm)
119855 Large Oval
119859 Extra-large oval
119868 1" (2.5 cm) Circle
119860 1-3/8" (3.5cm) Circle
129983 Chalk Talk Dies
Alphabet Soup Chipboard letter (Retired)
For My Family Stamps (Retired)
Special Edition Designer Papers (Retired)
Phew! I think that is everything! I hope you enjoy the card too and remember you can use products and punches you already have and just mix and match things up like I have. I really enjoyed getting creative with this one. I often get a little bit of time at once to craft so it was great to be able to keep going back and adding little bits to this one. I feel inspired now to start my Epic This and That journal which I have been meaning to start. A new year fast approaching and I want to capture those pre-school memories now whilst I still can!
Suzanne
x
To place an order, book a workshop in your home or come to a class, just drop me an email at craftyinkbuds@sky.com. Remember you can now order online at anytime too.
When searching around for male card ideas I came across a gifting card idea on Splitcoaststampers, but I cannot trace back to find the name, sorry. The card was a concertina of ideas and pockets in which to put little extra gifts such as gift cards, vouchers etc... As soon as I saw it I started to think of which DSP and ideas I could use. First of all though, here is the finished card so you can see it in all it's glory too!
Wow! I am beaming with pride! There is a huge list of what I used on this card; in fact it would probably be easier just to list what I haven't used on it!! To make your own though the greatest thing is that you can just use whatever you have and come up with your own design. I have also used some retired items on my card as I had them to hand and I wanted to put them to use.
I used the layout design from the card I saw and then decided I would use the Epic Day This and That designer papers as these were perfect for a masculine card. The colour theme throughout was Crumb Cake, Soft Suede and Pool party with some Calypso Coral and Early Expresso too. Keep reading though for the complete list of items used later.
There are three pockets on the card made to individual sizes. The pockets have slide out tabs made with the Decorative Label punch cut in half and secured on either end of a folded piece of card then tied with linen thread.


The 'I' of the card was themed "I feel lucky". I put a lottery ticket in this one for my Hubby, but it just as easily could contain a gift card.
I made my photo frame a little 'homemade' in styling, but you could use a square punch to get a more finished look. Did you see the gorgeous little button brads from the Vintage Trinkets on each of the frame corners?
The 'T' was for tickets for the cinema. As you don't generally get a ticket stub for the cinema in these times, I put a little promise note in there.
There was wording promising a cinema visit with hubby's choice of film. I had to promise no romantic chick-flick and so I am sure to be seeing a sci-fi or adrenalin-fuelled man-film in the near future!
'H' was for 'Husband'. A tab of lovely words for thanks for being my hubby. We don't often say these things as every day life catches up on us so it is great to be able to offer them on occasions with meaning.'D' was for the day and dates which had special meaning for us. The This and That range of products are all there to help capture your happiest and most memorable moments.
I used the Rotary Stamp to put reminders of special dates for us on this section of the card. "Don't forget", "Best Wishes", "Best Day Ever" and "Pencil Me In" for - our wedding anniversary, the big day, the day our son was born and a meal date.
(Note: I amended the year for the best day ever stamp from to say 2010 using the 2016 as the stamp dates on the rotary stamp are all for the current and future years).
The 'Y' is for 'Yummy', what would a birthday be without a cake? Now, for the long list of the items used on the card..........
Stamps:
130435 Alphabetized - for the 'happy'; I used the stamp-a-ma-jig and individual inked letters.
130535 Four You - "Birthday" on letter 'B'
130889 Simply Stars
128697 Pennant Parade - "Wish Big" on 'R', pennants on 'T', "Love" on 'H'
126941 Take a Ticket - on 'T'
130631 Chalk Talk - on 'H' tab and 'D'
128520 Create a Cupcake - "Happy Birthday" on 'D'
130336 Express Yourself - "amazing", "Happy Birthday" and "Celebrate" on 'A'
130390 Birthday Cake - on 'Y'
128547 Delightful Dozen - "Blow out your candles" on 'Y'
Accessories:
130814 Epic This and That Designer Papers
104199 Linen Thread
130029 Regal Buttons - on 'I'
118764 Vintage Trinkets - on 'I', 'T' and 'H'
131272 Simply Pressed Clay Moulds Buttons and Blossoms - button in Pool Party on 'R'
Punches/Dies:
119850 1-3/4" (4.4cm) Circle
125598 Labels Collection Framelits Dies
120907 Decorative Label - all tabs and "Love" label on 'H'
119871 Corner
122361 Petite Pennant Builder
129404 Scallop 7/8" (2.2cm)
119855 Large Oval
119859 Extra-large oval
119868 1" (2.5 cm) Circle
119860 1-3/8" (3.5cm) Circle
129983 Chalk Talk Dies
Alphabet Soup Chipboard letter (Retired)
For My Family Stamps (Retired)
Special Edition Designer Papers (Retired)
Phew! I think that is everything! I hope you enjoy the card too and remember you can use products and punches you already have and just mix and match things up like I have. I really enjoyed getting creative with this one. I often get a little bit of time at once to craft so it was great to be able to keep going back and adding little bits to this one. I feel inspired now to start my Epic This and That journal which I have been meaning to start. A new year fast approaching and I want to capture those pre-school memories now whilst I still can!
Suzanne
x
To place an order, book a workshop in your home or come to a class, just drop me an email at craftyinkbuds@sky.com. Remember you can now order online at anytime too.
Monday, 14 October 2013
Best of 25 Years - October
Oops......a little late...it seems I started this post and forgot to complete it. So if you have not seen it yet and have been waiting to here, there is an October Best of 25 years set! And here it is.....
To see a larger view of these Click here
These stamps are the best of the Sale-a-Bration stamp sets which we have had of past. Even more lovely flower designs returning to brighten up our days.
Well I have been busy playing with the Banner kit from the Autumn/Winter catalogue these last few days and I hope to post some more soon with photos for you too see it in all it's glory. Make sure you come back and see what fabulous looking banners and other decorative items you can make with this fantastic kit and the accessorizing kits too.
To place an order, book a workshop in your home or come to a class, just drop me an email at craftyinkbuds@sky.com. Remember you can now order online at anytime too by clicking the link to SHOP with me.
Friday, 4 October 2013
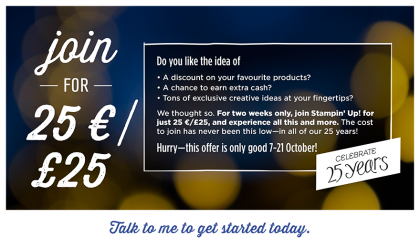
Join Stampin' Up! for just £25
More fantastic news to share with you today from Stampin' Up! From the 7th to the 21st October 2013, for just 2 weeks only, you can join
Stampin’ Up! for just £25! This is a fantastic economical way of joining as a Stampin' Up! demonstrator and taking advantage of all the great opportunities this will give you.
For £25 you will get to sample discounts, great resources to help you on your SU journey and extra income if you
want. Purchase the kit through me, and you’ll instantly become a member
of an established team structure full of friendly,inspirational demonstrators.
There are lots of benefits
from Stampin’ Up! when you become a demonstrator :
§ 20% off Stampin’ Up!
discount on products
§ Pre-order new products one month before the
customers sales period.
§ inspired by video
tutorials and project ideas on the Stampin’ Up! demonstrator web site and regular newsletters full of inspirational ideas.
§ Earn free stamps with
Stampin’ Start, Sale-A-Bration and other promotions.
§ Qualify for cash
bonuses, product bonuses, incentive trips and other awards.
§ Earn additional income
(called volume rebate) based on your monthly product sales.
§ Enjoy 2 free months of a
personalized Stampin’ Up! on-line store and blog.
§ There’s NO pressure to reach quarterly minimum of sales, or if you wish to end your time as a demonstrator at any time.
This offer is a specially priced £25 starter kit including :
- £25.95 worth of Stampin’ Up! product that you can pick from the Annual or Autumn/Winter Catalogue
- A Business pack of : a box of annual catalogues, a pack of current seasonal Autumn/Winter catalogues, Getting Started DVD, Order forms and Customer postcards
- An 10% extra discount on your first order of £150 or more when you place your order in the first 45 days of joining. This will mean a total of 30% off!!
- If you join and you are ready to party within your first 30 days. If sales for the party reach £150 or more you can also chose ANY stamp from the annual catalogue FREE!
There is also no postage to pay on the starter kit, but remember this offer kit is available only between 7th-21st October 2013. During the offer period, the regular
£99 starter kit will not be available.
You can choose to purchase the starter kit to for your own hobby, just to share with friends with catalogue orders or take that first step to start it as a business. I will support you as a team member and share ideas and business knowledge along with the great supportive structure and training offered within my upline.
If this is the chance you have been waiting for to sign up or you are considering it for the first time, you are sure to have some questions before you commit so please feel you can call on 07876 247678 or email me and we can talk through it some more.
This is a great opportunity to join right now so grab your chance!
Wednesday, 2 October 2013
It's Time to Party!
I have just logged on to the Stampin' Up! website and what a lovely surprise. Stampin' Up! are still in partying mood to celebrate their 25th anniversary. For you, this means they are sharing their party mood with a fabulous chance to earn extra hostess benefits this month when hosting a party.
Read on........
Read on........
Book a party just drop me an email at craftyinkbuds@sky.com now.
Suzanne
Saturday, 28 September 2013
Sharing What You Love
This is the sentiment from Stampin' Up! themselves, but this week certainly felt true to this for me. Firstly I wanted to thank those of you that came to my recent Open House event. Without the support of customers I would not be able to enjoy SU products and so I made some 'Thank You' cards to show my appreciation. I left a note inside attached with a post-it note so that the cards could be re-used by the recipient.
The cards were made with the Mosaic Madness stamp set and in the In Colours 2013-2015 selection of colours. The 'Thank You' is from the Four You stamp set. I really like the sizing of this and the style of the writing in this set, I wish my handwriting was as artistic as this! I had a few cards to make, but a little stamping and punching whilst I watched some TV and I had a efficient little production going. The Mosaic emboss folder gives a great background grid and I then just layered my mosaic tiles in a pattern as I wanted them with a mix of the colours.
Another card for you, this time with Christmas in mind. Yep, it really is time to start planning those Christmas festivities. Every year, if you are like me, you say you will start it early so as not to have the big rush on, well now is THAT time to start.
This card was a demo card to show a number of methods and techniques so has quite a bit going on. There are of course the Mosaic Madness layered in there. They are mounted on foam pads to raise them off the Label Love stamped images behind them. I wanted to show that although the Label Love has sayings on the stamps, when layered in this manner they can be used for other occasions too. The labels are punched with the co-ordinating Artisan Label punch and I then punched the coloured card and cut it in half to create the borders round the labels.
To create the wavy emboss lines I used the Simply Borders plate for the Simply Scored board. What an effective background and I think it ties in well with the label styling too. The flowers were meant to be a little poinsettia-looking by using the Boho Blossoms punch and using just the smallest and medium sized flower shapes (2 of the medium size and then a small one on top) with a pearl to finish. The little 'Very Merry' label to top the middle of the card is from the Very Merry Tags stamp set and punched with the small scallop circle punch (7/8" 2.2cm).
Two cards that hopefully show you how to use your existing, or possible purchases, from the main catalogue as well as the Autumn/Winter seasonal sets to make cards for all occasions, including the festive season.
To place an order, book a workshop in your home or come to a class, just drop me an email at craftyinkbuds@sky.com. Remember you can now order online at anytime here and check out the clearance rack whilst stocks last.
Subscribe to:
Posts (Atom)