Pages

Showing posts with label Circles Collection. Show all posts

Sunday, 12 July 2015

Blooming Lovely Sunny Days


The sun is shining and Summer is here!!! This is my favourite time of year!  I am sure the over-zealous use of the '!'s is a clue. There is nothing that seems so bad when the sun is shining. Maybe I am excited as it is soon the summer holidays from school and as I am so lucky to have a job that is term-time only I will soon be free to enjoy the sunshine (and crafting??) again soon!

Some of you may know already, but I am no longer a demonstrator for Stampin' Up! as I have taken a break from it for a while. Whilst I am sad to give up regular crafting meet ups with all of you, my lovely Crafty Ink Buds, I need to take some time away to find what I enjoy most again.  That said, here I am, and I hope to be able to continue to blog to share my creations.

I have finally managed to get some time in the craft room and revive my passion.  Well, needs must as July is a big birthday month in the family with myself, my sister and my mum all with birthdays this month, not to mention several friends. I have needed a production line of cards and have had to put together cards in multiples just to keep up with demand. What better stamp set to use than the Flower Patch set and it's matching Flower Fair dies - perfect summery blooms.  I love it!!! 


I have been stamping and cutting multiple blooms and then playing around with ideas on how to place them in various designs. One plus of not being a demo is I can use retired product without excuse so you may see retired items here more than before, but that said I still have plenty of current product and I am sure I am going to be a loyal customer for some time longer.


The base card for these two cards are a mix of the Kraft cardstock and also I have snuck in some use of leftover Christmas cardstock which has the Kraft background and then an oval flower ring design on it. 

I just stocked up on the Kraft paper rolls from Christmas in the same design which are on the Clearance rack - yes, I am already stocking up on Christmas wrap!! They are such a bargain, I couldn't resist and they are going to look great with coloured ribbon under the tree this year. Now, let's not get too carried away with this talk of Christmas, this is supposed to be all about a celebration of Summer.


I love how this card turned out, The flowers sit perfectly round the circles and a few glitzy diamonds....I mean rhinestones (well a girl can dream). There is the old Newspaper print DSP on this card, but there is still a Typeset paper in the current catalogue. The other colours are Pink Pirouette and Strawberry Slush (the old In Colours 2013-2015 still a firm favourite).  I think the leaf design looks great in Pear Pizazz and Old Olive too.


For the second card I used the Love Hearts emboss folder (also retired).  Actually there is a lot more retired product on these than I remembered! I am sure you all have retired paper and product you are hoarding too so it is good practise for me to start using some of it now that I can.

This one was a very Pink display, not usually my favoured colours, but I was inspired by some samples I had seen online.  I have some more examples of my own to show you as this crafting session and a few sessions enjoying the garden inspired me to try the flowers in other colours too. Do come back and take another look next time for some more colourful blooms!

Suzanne

x

I would love to hear your comments or if you prefer you can drop me an email at craftyinkbuds@sky.com.


Sunday, 21 December 2014

Christmas Countdown #5 - Wondrous Wreath Unwrapped


Well I am a bit behind on the Christmas Countdown, but here's a peek at a series of the more special Christmas cards I made for this years flurry through the postal system. They are a little thicker to post due to the ribbon ties so are perfect for those people you are seeing in person, but I wanted to send them through the post too for that extra special 'wow!' for those I knew would appreciate them the most.

I am forever asking forgiveness for my poor photography and today is no exception.We have a new camera and in a moment of panic I had to photo the cards with no instruction on how to use it and no time to read the manual! My new year's resolution will definitely be to read the manual!


The card is based around a design by the lovely Michelle Last who has a style I just love. The stamp set is the Wondrous Wreath set which comes as a bundle saving in the seasonal catalogue. Originally I missed out on ordering this set despite loving it when I first set sight on the seasonal catalogue, but soon all the lovely examples of cards just tempted me back to ordering it. I cannot wait to try out the other birthday card and all year celebration cards I have seen using it too. 

I have used, as Michelle did too, the Noel thinlit from the dies and layered it up to give it some additional stiffness and for it to stand out in the Silver Foil Card which is the top layer. My Noel is mounted on the stamped wreath image from the set.  I have stamped the two-step image with Soft Sky and Lost Lagoon to give the two tones for the leaves.

I have hung my wreath upon the All Is Calm DSP which also adorns the side panels of the card. I love the luxurious bows of ribbons used to wrap round the card under the wreath and tie in a bow at the sides. The All Is Calm is still a firm favourite and with the matching Lost Lagoon Silk Taffeta Ribbon it looks even more stunning. I love a card design that you can add sparkles too as you know, so who needs berries when you can add Rhinestones?

At Christmas it is the contact with those we love most which makes it the special occasion it really is and my father said to me in a poignant moment this season that it is not the card that counts the most, but the words inside it. I think the sentiment in this set is so true of those words as it says "May happy moments & cherished memories surround you with joy this season". I am hoping this season brings us some happy moments to cherish and the year ahead some joy too.

Hopefully I will make it back before the turkey is in the oven for some more inspiration for those last minute projects or ideas, but for now I will leave you with those sentiments.

Suzanne
x

Products I used for my cards:


To place an order, book a workshop in your home or come to a class, just drop me an email at craftyinkbuds@sky.com. Remember you can now order online at anytime too.

Tuesday, 18 November 2014

Seaside Sea Street Treat Cup Card

There's been lots of glitter, lots of sparkle and lots of Christmas projects on the go, but this weekend saw little one attend a birthday party for a school friend so of course a little card was needed.

After spending some time lost in the world of Pinterest I of course had narrowed my crafting time to produce said card down to an hour or so. Whilst browsing I came across some examples of the Sea Street stamp set and I realised I could use this. I just moved away from the usual nautical red and blue combinations, added a little pink here and there and this is what I came up with.

My little fishes are stamped in Melon Mambo and also some Strawberry slush.  To get the lighter tone I stamped off first. My other colour combination is Bermuda Bay.  I wanted the card to be a bit special so I added a Treat Cup and then put in some of the little 'friends' from the set, the little crab and the little lobster along with some of the starfish cut out.  

It's a must to have some sparkle right?  I add some beads I had from my stash and there are also some punched out Glimmer stars from the Dazzling Diamonds glitter paper. You can also just see in the photo that my Perfect Print Numbers dies have come in handy too to add the number '5' to the octopus. Here is a closer view.


I stuck my treat cup to the outside of the card to keep the image behind it and then I used my Circle Framelits to create a border.


The birthday celebration needed a little banner so I used the Banner Punch with the Designer Paper Stack in the In Colours 2013-2015 and the Thick Baker's Twine to create my banner. I glued the twine of the banner with glue dots and then stuck the banner pieces down with the two-way glue just overlapping the twine.


To finish it off with some birthday greetings, a little 'Happy Birthday' from the Something to Say stamp set and the 'Birthday Wishes' inside is from the Four You stamp set.

I hope the birthday girl liked it!

Suzanne
x

If you would like to try this card, these are the products I used:

Table built using Product Table Builder by The Crafty Owl - Independent Stampin' Up! Demonstrator.


To place an order, book a workshop in your home or come to a class, just drop me an email at craftyinkbuds@sky.com. Remember you can now order online at anytime too.

Tuesday, 12 August 2014

Something (more) To Say!

Well yesterday's card was a special birthday card, today's is a celebration!  This one is the same stamp set, 'Something to Say', but with a congratulations feel.  It could be to celebrate a birthday, exam passes or even another special occasion. I have used another new colour from the In Colours for this one, Lost Lagoon and teamed it up with Night of Navy from the Regals collection for the cardstock pieces.  For the stamping I have used the slightly lighter Coastal Cabana.  The Lost Lagoon is definitely a hit and I have doubled up with the gorgeous Satin Stitched ribbon to show it at it's finest.

This card is inspired by a card from another great SU demo, Michelle Last. Michelle's card was a similar style and sentiment, but used just cut card whereas I have flipped the layout round and used the Banners Framelits for my panels.   
The stamping is similar to yesterday using the Night of Navy and Coastal Cabana with the little star from the stamp set.  Can you see I have also layered some punched stars on the card too, made with the matching punch set.  Of course, I have stamped inside too!

I love that we have more satin ribbon back in this year's catalogue.  It is provides a neat finish if you can carefully use a lighter to seal the ends of the ribbon.  

My Circles for the 'Now Go Change The World' sentiment on the card were cut using another great collection of dies for the Big Shot, the Circles Collection. That is two great reasons in this post alone to take a closer look at the Big Shot promotion this month.  See how easy it is to cut your different layers and shapes with the use of the cutting tool and the ever expanding collections of dies we offer! The Banner Framelits are currently on offer too, so get them at a discounted price whilst you can.

To place an order, book a workshop in your home or come to a class, just drop me an email at craftyinkbuds@sky.com. Remember you can now order online at anytime too by just clicking the link at the top on the blog page.

Products Used:

Something to Say 134177 (wood)

Saturday, 19 July 2014

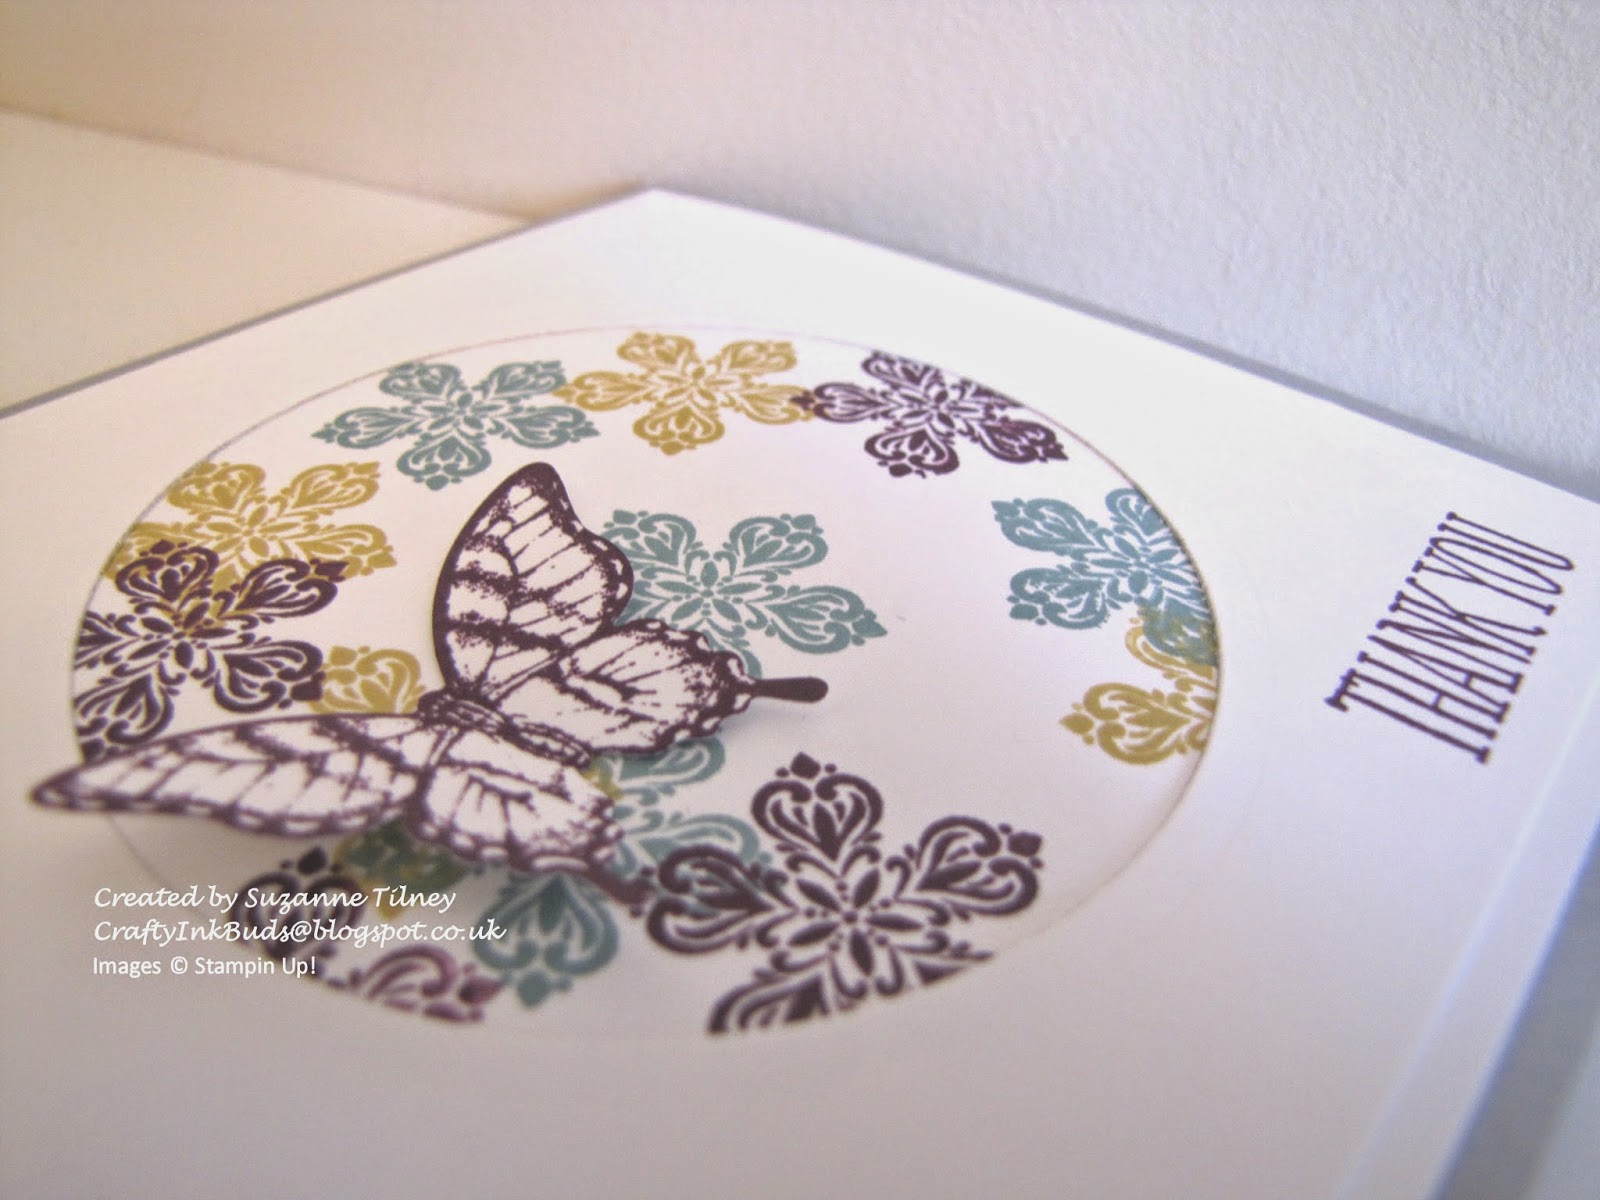
Blackberry Bliss Petite Petals Butterfly

Today we have been out enjoying the fabulous sunshine (when it finally arrived) and sitting watching the Farnborough Air Show as the planes flew over.  Unfortunately after a busy theme park day for my little one yesterday and a late drive back he fell asleep way before the Red Arrows display he had been waiting for started.  Oh well, another chance tomorrow to see them if he can stay awake!!

Today's card is a simple design using some of the new In Colours 2014-2016 again.  I have layered in Smoky Slate and Whisper White with a circle cutout with the Circles Collections Framelits dies.  I have left off all the dimensionals or any embellishments on this one so apart from the butterfly there is nothing standing out to cause the extra postage.


I simply stamped using the Petite Petals with the colours Blackberry Bliss, Lost Lagoon and Hello Honey in a random pattern.  I have been using only one or two of the flower designs so I had purposefully picked out one of the other designs for this card and I am glad I did.

The 'Thank You' comes from the Something to Say stamp set which is already proving very useful for a number of occasions and celebrations.  You can never have too many thank you cards lined up ready to send.  The butterfly, of course, you will recognise from the Papillon Potpourri set as it has made a number of appearances, but with all these flowers in the garden in bloom and watching the wildlife each day it is hard not to put the two together too when crafting.

I love the new colours and I am loving finding new combinations with them with both my existing stamp sets and the new ones I have to show you too.

Don't forget to drop by again soon for some new inspiration. 

Suzanne
x

To place an order for any of the products I have used, book a workshop in your home or come to a class, just drop me an email at craftyinkbuds@sky.com. Remember you can now order online at anytime too by just using the online shop link at the top of the blog page.