Pages

Showing posts with label Decorative Label. Show all posts

Monday, 11 August 2014

Something To Say Folded Card

With everything that leaves the catalogue that you fear you will never be able to replace, along comes another must-have product or stamp set that fits into the space left behind. Today's post is of a card I made with my lovely group of regular ladies who just loved the new in colours for this one, Blackberry Bliss and Hello Honey.


This was a simple folded card with an overlap closure that I secured with a decorated belly band. I used a single sheet of A4 cardstock and cut at 14 cm along the short edge for the full length. I then scored and folded at 9cm , 18cm and 27cm using the whole long length of the card.  I folded the card and rounded all the corners to soften the shape.  I used the corner punch on the back of the Envelope Punch Board for my corners.

Now the stamps for this card are the 'Something to Say' set from the new annual catalogue. This is a set I ordered initially to fill a gap in the general celebration and occasions selection after the recent retirements. It has birthday greetings, friendship, kind words, and celebrations, what more could you need? It also comes with it's own sweet trio of a star, a heart and a mini flower. Now if you know me, you know I love anything small, petite and cute (probably something to do with my own 'compact' size)! Even better, there is a matching punch set for the little trio too!!  


The layers of the card inside were then the lovely Natural Ivory cardstock (108630) which can be found on page 193 of the main catalogue. Sometimes you get so used to the white or cream layers you forget that we have a variety of speciality card an paper too which can be used. I love the speckled neutral shades of this paper as a change to the brilliance of the Whisper white or the smooth creamy Very Vanilla cardstock I usually use.  

Inside my card as there were three spaces for inserts I used three sayings from the set,  'Big Ways, Small Ways', 'Love You Always' and 'Happy Birthday'. For each insert I then used one of the three of the trio, the flower, the hearts and then the star. I stamped each randomly in Blackberry Bliss and then again as a shadow effect to the original stamp placements with the second colour, Hello Honey.

For the Belly Band it was the co-ordinating designer paper band which was then decorated with a collection of punched pieces. I used the Decorative Label layer at the back in Hello Honey, then the 1 3/4" Scallop Circle in Blackberry Bliss to surround the sentiment from the 'Label of Love' stamp set. I stamped the sentiment twice and just used snips to cut the centre out of the Hello Honey version. The petite flower on the belly band are a perfect partner with some of the smallest pearls.

There's so many other ideas for the 'Something to Say' set and I have plenty more to show you.  I am still crafting through the holidays where I can in between some kiddy crafting with my little one to keep him amused, not to mention playing with my new Seasonal pre-order items which have arrived! 

Suzanne

x

Products used:

Something to Say 134177
Label Love 130619

To place an order, book a workshop in your home or come to a class, just drop me an email at craftyinkbuds@sky.com. Remember you can now order online at anytime too.

Sunday, 13 April 2014

Springtime Sunshine, Petals and Butterflies


A bit later than promised as I just had to tell you about the Weekly Deals being offered by Stampin' Up! throughout April first, but here is the card layout that I was playing with previously.  Now the sunshine is with us it is the perfect time to be out enjoying the sunshine.  Pack a picnic, take a rug and find your spot to sit and enjoy nature in all it's glory!
This card is one I made with a group of lovely ladies this week and they loved the colour combinations of the Elegant Eggplant, Coastal Cabana, Daffodil Delight, and Pear Pizzaz. 

The designer papers used for the card were the Afternoon Picnic from the main catalogue.  These papers have a selection of patterns to play with; five-sided hex's, chevrons and circles.  All of these shapes are featured with the other co-ordinated products, punches and Big Shot framlits.

I started our card with a base of cardstock measuring 13.5cm x 27cm to make a finished card 13.5cm square.  The card base is then easily made by creating a diagonal fold on the top of the card and it is the decorative label mounted on the dimensional foam pads which then holds the card in position when opened.  The fold line was started from the top left down to the bottom right for the diagonal.  Once we had figured out the fold the right way, the ladies were off to a great start!
For our card, I layered up the designer paper with Petite Petals and Papillion Potpourri punched images for a beautiful celebration of spring.  See also the Label Love sentiment and Artisan Label also on there for the greeting.

I loved the colours, patterns and the Springtime theme of this one, I hope you do too.

Suzanne
x

Products I used:

Punches/Dies -
*** Bundle Offer *** Buy the Petite Petals Stamps and punch for a saving of 15% 134821 Petite Petals Bundle
Stamps -
Petite Petals 
Paper/Card - 

Colours -
Elegant Eggplant
Coastal Cabana
Daffodil Delight
Pear Pizzaz
NB: The Afernoon Picnic colours vary slightly from the selection I have used.

To place an order, book a workshop in your home or come to a class, just drop me an email at craftyinkbuds@sky.com. Remember you can now order online at anytime too.


Saturday, 21 December 2013

Washi Tape Pegs and Tags

The weather outside is certainly frightful, I hope you are all safe and warm inside.............as I write this my hubby is currently outside shoring up our fence which is about to take it's very own Christmas flight. I am here, inside, keeping dry with the kettle on for a nice warm drink when the rescue crew return. So, my second post in a day - Wow! I must be on a crafting roll for Christmas!
As promised here is a picture of some little extra tags and Washi Tape Pegs I have made to decorate and label my parcels.  Earlier I mentioned the Very Merry Tags (130393) stamp set in my post, well here they are again.  The tags are cut again with the Chalk Talk dies .  I cut a bunch in one craft session so I had some ready cut and then have just decorated as I found time.  I made these tags for gifting so I have made them into a little gift package with the Cherry Cobbler Baker's Twine (123125) wound ready for cutting to the required length.

There are several designs which match punches that you may or may not already have in your collection so some easy stamp and punching and you have beautiful homemade tags to use!  I loved the cheeky 'Naughty Nice' checkbox tag design which matches the Decorative Label Punch (120907) .  I have also used the little 'Very Merry' and 'I ~heart~ Santa' stamps from the set with the matching 7/8" (2.2cm) scallop circle (129404) and Petite Curly Label (129405) punches.  I did also sneek in that small snowflake again from the Snow Day (131892) set too.
The Pegs are just plain wooden washing pegs which I picked up at a local discount store and all I have done to smarten these up is  use the Season of Style Designer Washi Tape (132155) to cover them. Just perfect for adding to a parcel, gift bag or gift tag.  To sit them on the card background for my gift package I have punched with the Word Window Punch (119857)  to create and opening and then pegged them through.

I hope you like them and have some ideas for making your own tags for that extra personal wrapping.

I'll be back soon with some more Christmas crafting so make sure you keep dropping by.

Before you go, here's that list of items used:

Very Merry Tags (130393)
Decorative Label Punch (120907)
7/8" (2.2cm) scallop circle (129404)
Petite Curly Label (129405)
Snow Day (131892) 
Cherry Cobbler Baker's Twine (123125) 
Season of Style Designer Washi Tape (132155) 
Word Window Punch (119857)  

Suzanne
x

To place an order, book a workshop in your home or come to a class, just drop me an email at craftyinkbuds@sky.com. Remember you can now order online at anytime too.

Monday, 21 October 2013

Epic Day This and That Birthday Wishes

Today is my hubby's birthday and I have not been able to wait to show you the birthday card I crafted for him to celebrate and mark the occasion.  Now my hubby is a techie-geek so his birthday wish list was for the latest gadget of course.  These things are not the cheapest presents to buy so that really didn't leave much else for me to go purchase.  I love usually just going and buying little inexpensive bits which I can put some thought into for presents (probably as this is what I like most to receive too) so I wanted to put something into his card instead.

When searching around for male card ideas I came across a gifting card idea on Splitcoaststampers, but I cannot trace back to find the name, sorry.  The card was a concertina of ideas and pockets in which to put little extra gifts such as gift cards, vouchers etc... As soon as I saw it I started to think of which DSP and ideas I could use.  First of all though, here is the finished card so you can see it in all it's glory too!


Wow!  I am beaming with pride!  There is a huge list of what I used on this card; in fact it would probably be easier just to list what I haven't used on it!!  To make your own though the greatest thing is that you can just use whatever you have and come up with your own design.  I have also used some retired items on my card as I had them to hand and I wanted to put them to use.

I used the layout design from the card I saw and then decided I would use the Epic Day This and That designer papers as these were perfect for a masculine card. The colour theme throughout was Crumb Cake, Soft Suede and Pool party with some Calypso Coral and Early Expresso too.  Keep reading though for the complete list of items used later.

There are three pockets on the card made to individual sizes.  The pockets have slide out tabs made with the Decorative Label punch cut in half and secured on either end of a folded piece of card then tied with linen thread.


The 'I' of the card was themed "I feel lucky". I put a lottery ticket in this one for my Hubby, but it just as easily could contain a gift card.
I made my photo frame a little 'homemade' in styling, but you could use a square punch to get a more finished look. Did you see the gorgeous little button brads from the Vintage Trinkets on each of the frame corners?

The 'T' was for tickets for the cinema.  As you don't generally get a ticket stub for the cinema in these times, I put a little promise note in there.


There was wording promising a cinema visit with hubby's choice of film.  I had to promise no romantic chick-flick and so I am sure to be seeing a sci-fi or adrenalin-fuelled man-film in the near future!

'H' was for 'Husband'.  A tab of lovely words for thanks for being my hubby.  We don't often say these things as every day life catches up on us so it is great to be able to offer them on occasions with meaning.

 'D' was for the day and dates which had special meaning for us.  The This and That range of products are all there to help capture your happiest and most memorable moments.

I used the Rotary Stamp to put reminders of special dates for us on this section of the card.  "Don't forget", "Best Wishes", "Best Day Ever" and "Pencil Me In" for  - our wedding anniversary, the big day, the day our son was born and a meal date.
(Note: I amended the year for the best day ever stamp from to say 2010 using the 2016 as the stamp dates on the rotary stamp are all for the current and future years).

The 'Y' is for 'Yummy', what would a birthday be without a cake?


Now, for the long list of the items used on the card..........


Stamps:
130435  Alphabetized -  for the 'happy'; I used the stamp-a-ma-jig and individual inked letters.
130535  Four You - "Birthday" on letter 'B'
130889  Simply Stars
128697  Pennant Parade - "Wish Big" on 'R', pennants on 'T', "Love" on 'H'
126941  Take a Ticket - on 'T'
130631  Chalk Talk - on 'H' tab and 'D'
128520  Create a Cupcake - "Happy Birthday" on 'D'
130336  Express Yourself - "amazing", "Happy Birthday" and "Celebrate" on 'A'
130390  Birthday Cake - on 'Y'
128547  Delightful Dozen - "Blow out your candles" on 'Y'

Accessories:
130814  Epic This and That Designer Papers
104199  Linen Thread
130029  Regal Buttons - on 'I'
118764  Vintage Trinkets - on 'I', 'T' and 'H'
131272  Simply Pressed Clay Moulds Buttons and Blossoms - button in Pool Party on 'R'

Punches/Dies:
119850  1-3/4" (4.4cm) Circle
125598  Labels Collection Framelits Dies
120907  Decorative Label - all tabs and "Love" label on 'H'
119871  Corner
122361  Petite Pennant Builder
129404  Scallop 7/8" (2.2cm)
119855  Large Oval
119859  Extra-large oval
119868  1" (2.5 cm) Circle
119860  1-3/8" (3.5cm) Circle
129983  Chalk Talk Dies

Alphabet Soup Chipboard letter (Retired)
For My Family Stamps (Retired)
Special Edition Designer Papers (Retired)

Phew! I think that is everything!  I hope you enjoy the card too and remember you can use products and punches you already have and just mix and match things up like I have.  I really enjoyed getting creative with this one.  I often get a little bit of time at once to craft so it was great to be able to keep going back and adding little bits to this one.  I feel inspired now to start my Epic This and That journal which I have been meaning to start.  A new year fast approaching and I want to capture those pre-school memories now whilst I still can!

Suzanne
x

To place an order, book a workshop in your home or come to a class, just drop me an email at craftyinkbuds@sky.com. Remember you can now order online at anytime too.

Friday, 8 March 2013

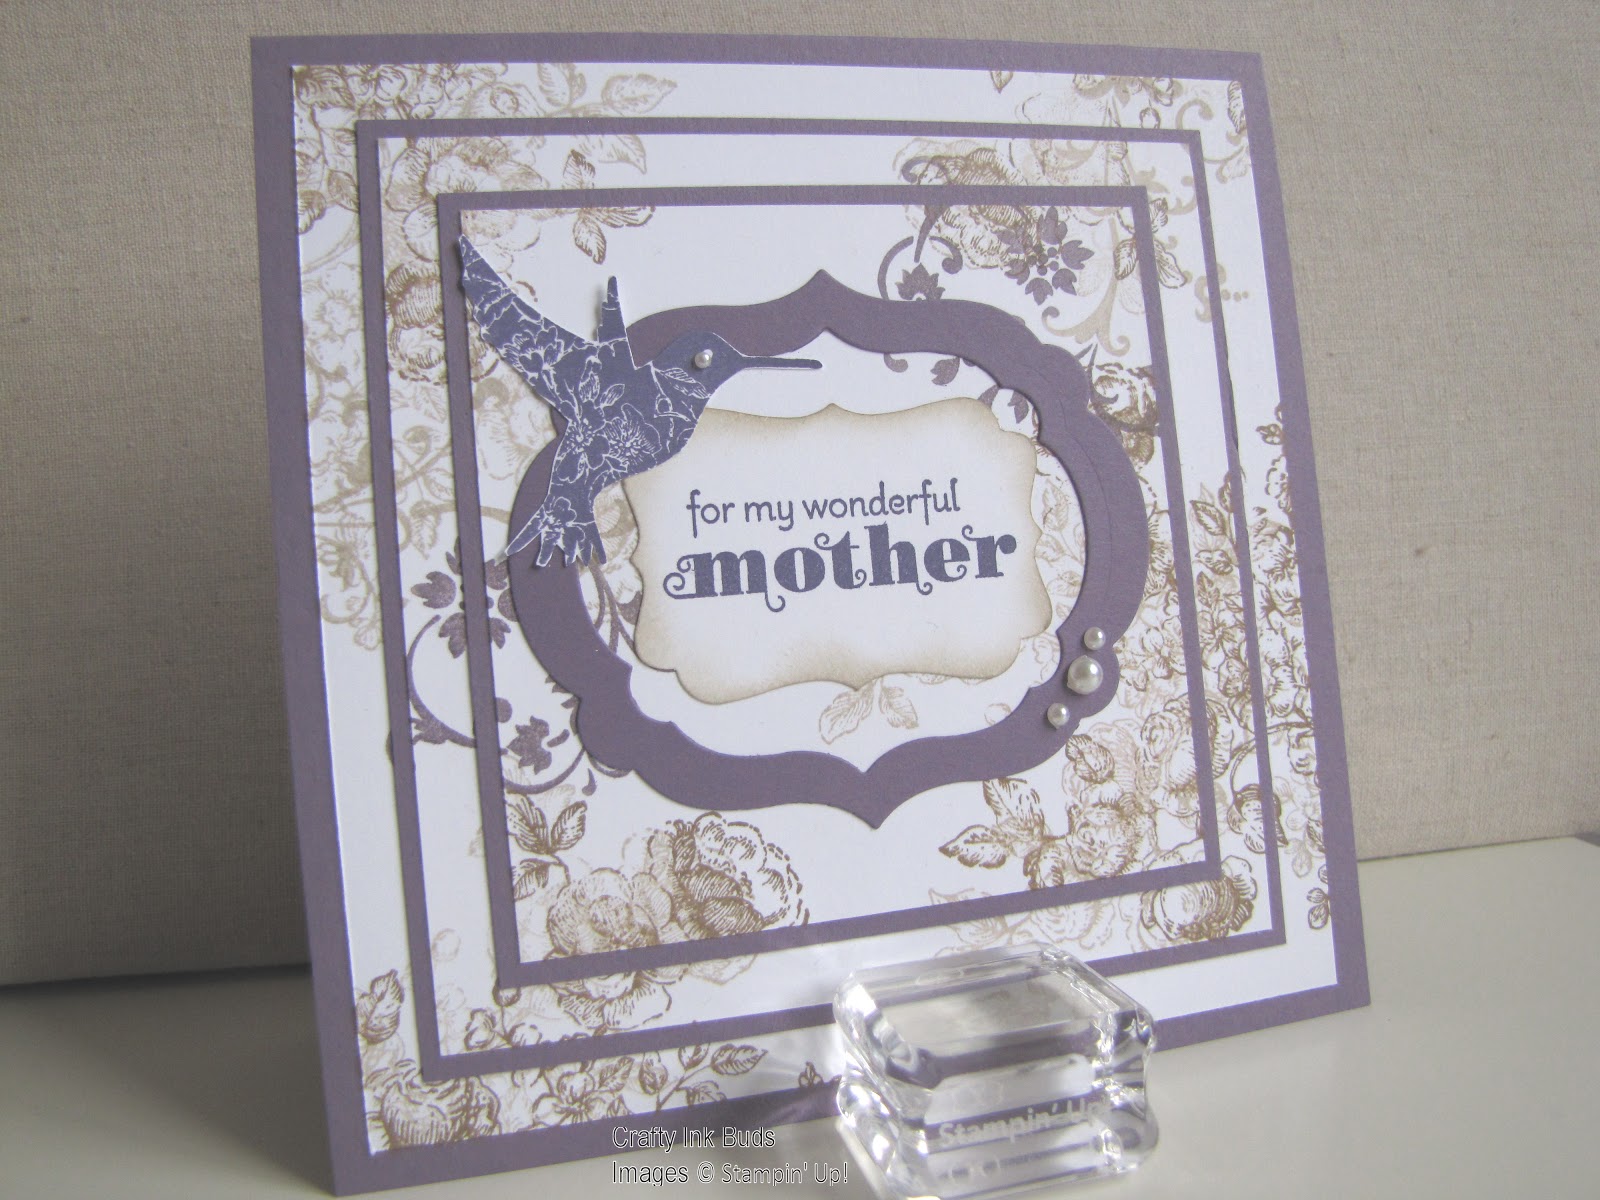
Mother's Day Stampin' with Love


Well it is a little early to post these as it is before Mother's Day, but I have been having so much fun with my Elements of Style stamp set I just wanted to show you all what I had been making.

The triple-layer stamping is one I had seen around and been wanting to try ever since I saw an example with this same stamp set. It looks beautiful and so effective with this set.I love creating shadow of the bigger stamp on the background by stamping with the Crumb Cake then again with soft suede.


 Another Mother's Day card with the same set, but this time pretty in pink. I stamped and coloured with blender pens and then cut out the flowers to overlay a framelit. I used some sponge daubing on this card to give it a vintage feel.

The Embosslit butterflies feature here with one of the Vintage Faceted Buttons. These buttons look just fab with a pearl in the middle as I used here. I am already well on my way through my second pot of buttons.

The background for this card is with the larger stamp as a watermark effect. You cannot see the back of the card, but I stamped all over the back too and a little on the inside corners which finished the the card off.
 
As the rain seems to be back again this is a reminder of the few days of sunshine we have had this week.  It almost felt like summer - well a British summer anyway! 

My last card for today's post, a challenge to myself to create something with less stamping!  My creative inspiration, the Floral District designer papers and some of the standard designer papers in Daffodil Delight.

This card is all punching, cutting and scoring, except for the sentiment of course (from the 'Deligthful Dozen' set).  The background border has been created with the Simply Scored scorepad and the new Scored Borders plate found in the spring catalogue (p26). This creates beautiful embossed borders matching your framelits shapes or can just be used alone for embossing.  There are full size continuous designs for using on scrapbook pages or just on the edge of a card design as I have. The plate has it's own template to help you line up and keep on track too - no slip-ups!    

If you'd like to see more of these products why not book a party or come to a workshops? Or if you'd like to order them to use yourself, email me at craftyinkbuds@sky.com.

Tuesday, 26 February 2013

Sweet Patterned Occasions

It's still Sale-a-Bration time!!  I am still Sale-a-Brating in my craft room with all the great stamp sets that are being offered as part of the promotion.  Remember a £45 purchase and you too could own one of the fabulous stamp sets or other products too!

Another set from the free products is Patterned Occasions and it is just great.  Lovely designs with instant sentiments for quick easy cards for birthdays, thanks, get well, friendship and other celebrations. The set is sized perfectly to fit in quite a few framelits for the Big Shot, but also fits into punched circles.  The sweet little cupcake is adorable as is the little elephant (who doesn't love a little elephant to stamp with?).
Here's the little cupcake for an easy birthday card. I layered circles using the Big Shot Originals Circles #2 die for my card.

The colours are a mix of Rose Red, Pool Party, Rich Razzleberry and Pretty in Pink. 

I matched the Polka Dot background emboss and patterned designer paper from the standard Designer Series Paper Stack.  Add a little scallop border with punched holes and some sparklies and you have a lovely sweet birthday cupcake card.

For the cute little ele friend I stamped in Basic Grey and stamped twice so that I could cut out his ear and stick it on a dimensional (sounds painful, but no animals were hurt in the making of this card!).

Pool Party is one of my favourite springtime colours right now so this card is all about this gorgeous blue.  The designer paper is from the Afternoon Daydream scrapbook kit - a beautiful complete kit of papers and accents.  I didn't use too much paper for the card as I have plans for the rest of the kit and I am having to resist using too much until then!!

The Vintage Wallpaper emboss folder super compliments the paper design and I daubed it with whisper white craft ink to accent.  I then, completely by chance, had the 'Wishing you a day as perfect as you are' sentiment from the Vintage Verses set (also Sale-a-bration) stamped out and cut out in a Labels Collection Framelit, so I trimmed this in half and added it as a frame around the circle.

Time for some latte lovin'?  We should all make time for those cups of coffee (or tea) with friends - what a great little stamp for calling on friends or neighbours. Here's a little stack of them in the In Colours 2012-2014.

Of course, buying the marker pens allows you to colour in individual parts of the stamp different colours and also is a great way to try colours to see which ones are favourite before progressing to ink pads.  The In Colours are a set of 5 pens at just £11.75 so a great way to get a quick collection of colours.  I recently discovered some tips for the SU markers - did you know?:
  • They can be refilled using the Ink Refills
  • As well as the tip picture to show you which end is which, the lines which wrap round the pen are different widths to show this too
Thanks to Michelle Last, another SU demonstrator, for these tips! To see how to refill you can visit Michelle's Blog http://www.michellelast.typepad.co.uk/

In case you are wondering which punch I used round the 'whole latte love', this is a Decorative Label punched twice to create the custom shape.
 
Sale-a-Bration continues until 22nd March - I still have availability for parties or can take orders for delivery before this date for your chance to earn FREE products.
 
To place an order, book a party or come to a workshop email me at craftyinkbuds@sky.com or call me on 07876 247678.